If you are the owner of an MSI monitor then congratulations you have made a great choice in monitor brands.
Whether for gaming or work, MSI monitors offer outstanding performance at a great price point.
MSI monitors are also incredibly user friendly, whether using their Windows based software, or through direct controls on the monitor itself.
What isn’t always clear however is how you change the refresh rate on these monitors.
Here we will look at two simple ways to adjust this setting. Read on for our step by step guide.
How To Change The Refresh Rate On An MSI Monitor
There are two ways in which you can access the refresh rate (hz) settings on these monitors.
Before we start I would recommend connecting your monitor with a DisplayPort cable. This will enable you to access the upper hz settings.
Some MSI monitors are actually locked to a maximum 120hz when using a HDMI cable.
This can be the case for models such as MSI Optix G24C or G241 .
Also make sure to have the latest driver installed, which can be found via the MSI support page found here.
Method 1 – Through Windows Settings
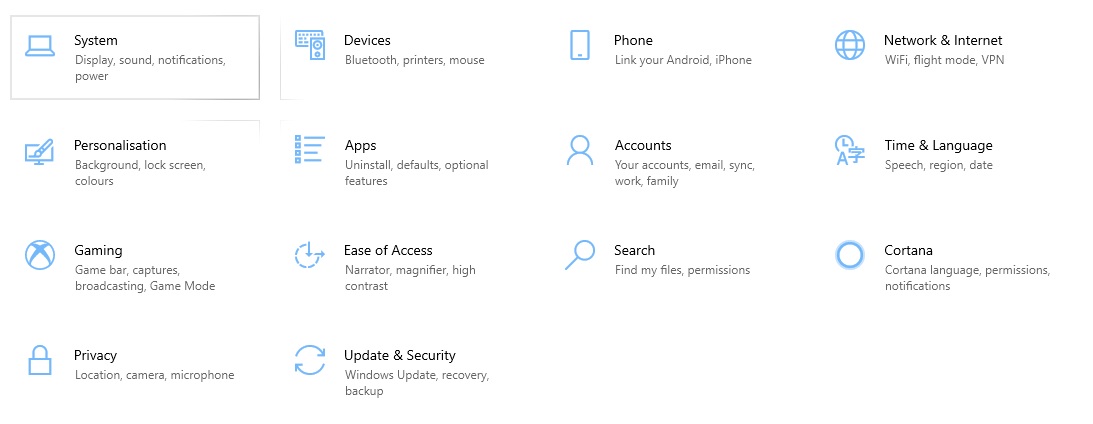
From Windows desktop, firstly click on the Windows Start button in the bottom left.
Next select the cog icon, which is just above the power icon, to access ‘settings’.
This will bring up the following screen, from which select the ‘system’ option in the top left.
Next, scroll down on the right hand side until you see ‘Advanced display settings’
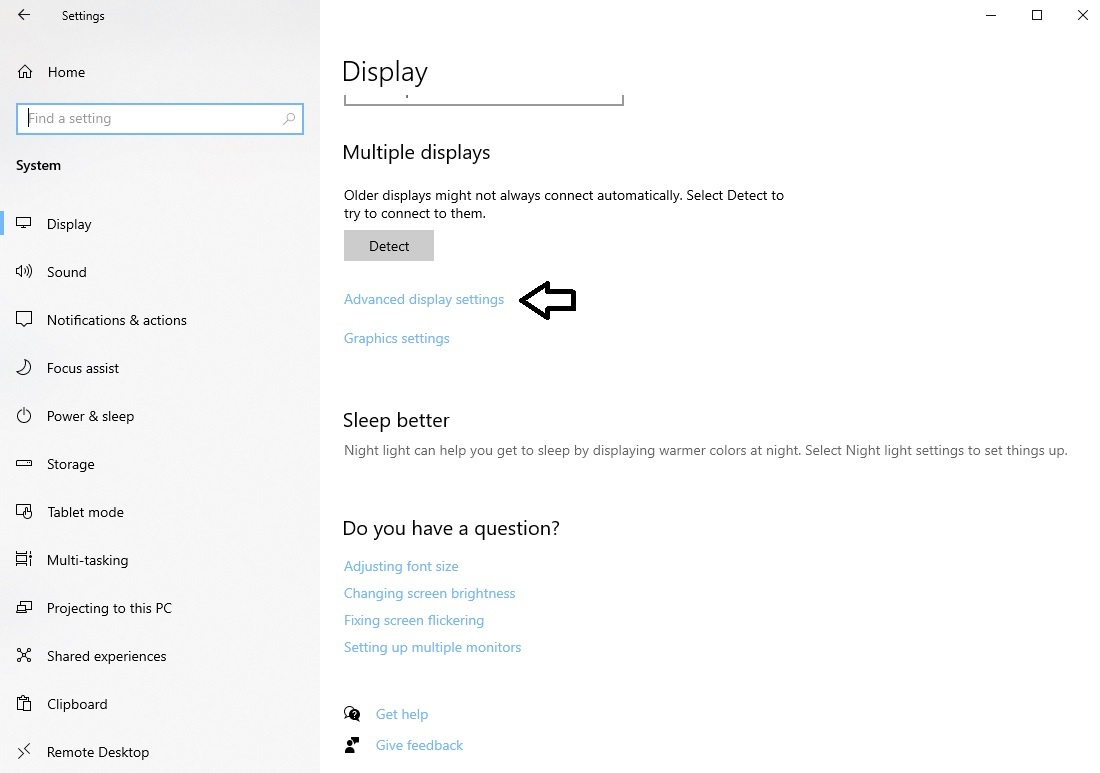
Select this option and you will see the following screen.

Select ‘Display adaptor properties’ and you will be taken to the following window.
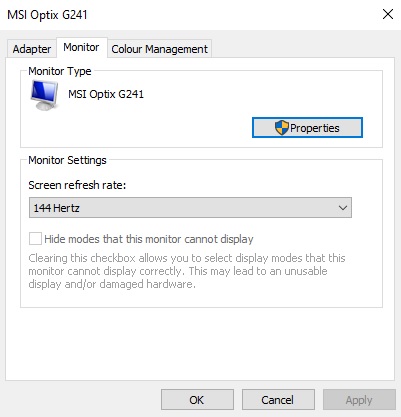
Click on the ‘Monitor’ tab at the top and you should see a screen refresh rate drop down menu.
From here you can see available refresh rates for your monitor.
Select a refresh rate and click ‘Apply’.
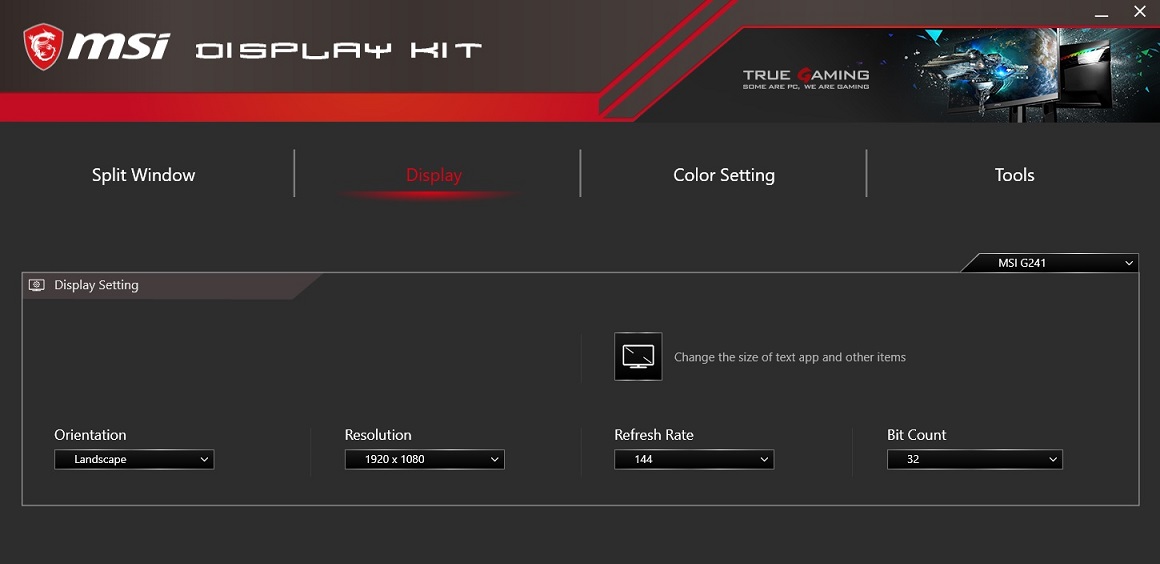
Method 2 – Through MSI Display Kit
MSI Display Kit is the software used to adjust settings on your monitor through your desktop.
This can be downloaded on the MSI website through this link. I would recommend first however downloading the latest driver for your monitor via the support page found here.
Once these have been installed, load up the MSI Display Kit. The refresh rate can be adjusted by selecting the Display tab and then choosing the Refresh Rate drop down menu.
Checking Refresh Rate Via Your Graphics Card Software
Finally, you can confirm the current refresh rate by using your graphics card windows software.
This can be done as follows:
For AMD Cards – Right Click Desktop > AMD Radeon Settings > Display Tab > Specs Tab
For NVIDIA Graphics Cards – Right Click Desktop > NVIDIA Control Panel > Select Change Resolution on Left > Refresh Rate Drop Down (on right)
Conclusion
Hopefully these methods will make it easy for you to adjust and check the refresh rate on your MSI monitor.
Thanks for checking out this article, you can check out more articles like this by clicking here.